Translate

Tuesday, February 18, 2014

Luck 'O the Irish Pot of Gold

Hello, friends!  Thank you so much for taking the time to stop by! 

With Saint Pat's day nearly upon us, I thought it would be fun to make a craft fit for the season, which is so whimsical and fun!

To make these door hangers, you will need:

Irish pots in black or green
Gold coins
Cardboard
Ribbon of your choice
Irish figurine
Industrial-strength glue gun and glue sticks
Writing utensil
Scissors


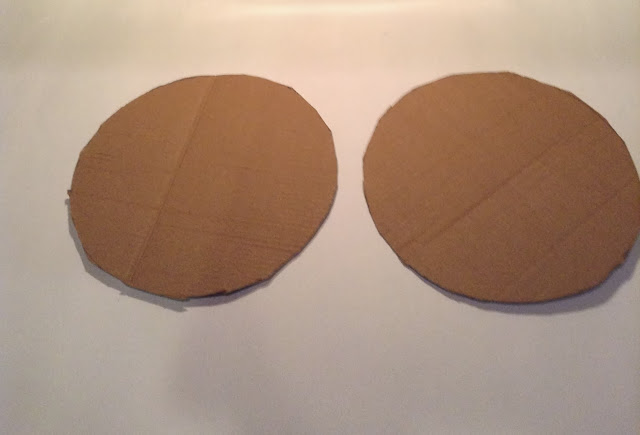
Begin by drawing a template onto your cardboard using the top of your pot.


Cut out.


Measure the cardboard template by placing it onto the rim of your pot,


trim and cut away cardboard until the template fits just inside the rim of the pot.


Bead glue onto the rim of the pot,


and lay the template into place.


On the side where you intend to place your figurine, glue down a small strip of cardboard to reinforce and hold the handle in place in an upright position.


Next, glue the coins down slowly building, layering, gluing some at an angle,


until you have a stack. Be sure to cover up any visible cardboard. 


Finally, glue down your figurine. Isn't he cute?  So jaunty and clever!  :) 


The figurine was ceramic, so compared to the pot, it was rather heavy.  I made sure it would not budge by gluing him down onto the coins,

the handle,

and by gluing a coin onto his back and the coins for further reinforcement. 

Finally, I added a fun ribbon. I measured,

and cut the ribbon exactly in half. 


Dot glue onto the pot


and tie the ribbon.  Once tied, glue the bow into place.  

Finally, remove as much of the hot glue spider-webs as possible. 


Voilà!  You may use these as simple table or vignette décor,


or do as I have done here....I added a small strip of ribbon to hang them on my front doors.


Closeup. 

Where to buy:
Pots, $2.50 each at Hobby Lobby (clearance)
Coins, $1 per package at Big Lots
Ribbon and figurines, Michael's Crafts

You may also use these little guys as centerpieces.  To see them featured in my Tablescape, visit the post on my blog Parsimonious Décor Darling by clicking here.

Please join me and others beginning March 12 at Cuisine Kathleen's annual Saint Patrick's Day Blog Crawl by clicking here.

If you enjoy this post, please visit the archives!  You may also visit my full profile to view my other blogs. Connect with me on my Facebook Page, Parsimonious Décor Darling.   You might like to visit my other blog hubs,

The Marvelous Maison, a lifestyle blog hub and 
Frugal Fab Fashionista, my fashion blog hub. 

Follow me on Pinterest!!  Please be sure to kindly follow the board guidelines, as it takes time and effort to find fabulous pins across the Internet and Pinterest!  Thank you!  

Thank you for stopping by! ❤


Tuesday, February 11, 2014

Easy Saint Valentine's Door Hanger

Hello, friends....thank you for visiting my blog!

Wow!  Certainly, the most consistent thing about California weather is that it is rarely consistent.  As I write this post, it is beginning to pour outside....which is such a contrast to my Parsimonious Décor Darling post on 1/24, during which, the temperature was well into the 80s. That tends to work as a double-edged sword, however....no fun if you have to run errands (and catch cold like I did), but perfect for crafting indoors!!  Today's very overdue post will feature how to make a really easy door hanger just in time for Saint Valentine's Day.  I hope you enjoy!  
You will need:

One large poster board
Assorted rose stems, approximately 16 to make two hangers
Ribbon
Standard wire dry-cleaning hangers
A saucer or other small round object
A ruler
Writing utensil
Crafting scissors or plier tool
Industrial-strength hot glue gun and glue sticks


Begin by removing the paper from your wire hanger. 

Stretch the hanger so that it resembles a quasi-triangle. 


Place the hanger onto your poster board.  Mark with a pencil. 

Where you have marked, use the saucer to draw two overlapping circles.


This will form the top portion of a heart. The overlapping circles should be larger and slightly outside the perimeter where you have marked. 


Now, use the ruler to form and draw the bottom portion of your heart shape.  


The hanger should fit just inside the form. 


Cut out. 

I cut an additional amount away from the top of the heart to make it look more defined. 


With an industrial-strength glue gun, bead glue over the top of the wire hanger.  Hold it down long enough for it to cool. 


Once glued down in an ample amount of places, add your flowers. 

Add and scupt around the template until your hearts are completely filled in. I used three colors; lavender, pink, and red.  You may opt to use a monochromatic color palette if you prefer a more refined look. 


Use your crafting tool to close the hanger top.  


Thread ribbon through the loop and create a bow.  


I repeated this step with a smaller red bow....you will then have one larger bow with one smaller one in front.  

Dot glue to hold in place. 

Finally, I used the last coordinating color (lavender) to hang the ornament.


Thread the thin ribbon through one of the bow loops.  

Viola!  

Closeup.


If you enjoy this post, please visit the archives!  You may also visit my full profile to view my other blogs. Connect with me on my Facebook Page, Parsimonious Décor Darling.   You might like to visit my other blog hubs,

The Marvelous Maison, a lifestyle blog hub and 
Frugal Fab Fashionista, my fashion blog hub. 

Follow me on Pinterest!!  Please be sure to kindly follow the board guidelines, as it takes time and effort to find fabulous pins across the Internet and Pinterest!  Thank you!  

Thank you for stopping by! ❤