Translate

Tuesday, October 29, 2013

Easy Inexpensive DIY Ornaments


Hello, Friends!  Thank you for taking the time to visit my blog! 

Today's tutorial will be about how to make your own inexpensive ornaments.  As we are in October as I write this post, these are fall-themed ornaments I am making.  However, you may use this tutorial for any kind of foam ornament you'd like to create...the possibilities are as limitless as your imagination!! 

You will need:

Foam bowl-filler decorations of your choice
Thin or small-size paper clips
Hot glue gun and glue sticks
Wire-cutting craft scissors

First, clip your paper clip precisely in the middle where the small curve is. 


The inner arch will be removed to create this little U-shaped pin. 


Next, clip the remaining portion of the pin in half as well, creating two more U-shaped arches. 


From the one paper clip, you should now have three little U-shaped arches.  


Gently press the arch into the foam bowl-filler.  I found these adorable sparkly pumpkin bowl fillers at Big Lots.  The box cost $2.49 for 44 bowl-fillers. 


Bead a small amount of hot glue around the arch.  Complete as many as needed equivalent to the amount of ornaments you have.  Set aside.


Next, take a paper clip and cut it right at the bottom of the side opposite the double loop. 


You will now have a small hook.  Thread it through your ornament.
 

Use your crafting scissors to carefully close the loop. 


Gently pull open the other side.  Taaa-Daaa!  Instant Hook.  :)  Your ornaments are now ready for use!  Factoring in the cost of the paper clips, this project cost less than $5 to complete the 44 ornaments.


If you enjoy this post, please visit the archives!  You may also visit my full profile to view my other blogs. Connect with me on my Facebook Page, Parsimonious Décor Darling.   You might like to visit my other blog hubs,

The Marvelous Maison, a lifestyle blog hub and 
Frugal Fab Fashionista, my fashion blog hub. 

Follow me on Pinterest!!  Please be sure to kindly follow the board guidelines, as it takes time and effort to find fabulous pins across the Internet and Pinterest!  Thank you!  

Thank you for stopping by! ❤


Tuesday, October 15, 2013

Festive Halloween Wreath

Hello friends!  Thank you for visiting my blog!  It will be Halloween in only a couple of weeks!!  So much fun!   My three-year-old chirps to me almost daily in the cutest voice, "I can't wait to be Minnie Mouse!"  Ahh, the simple pleasures of childhood. :)

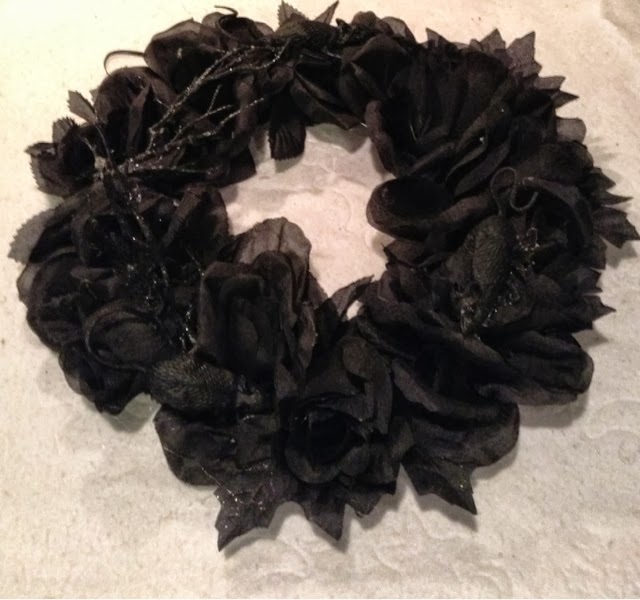
In honor of the season, the next couple of posts will be Halloween-geared.  Today's post is how to make wreaths using inexpensive items from the 99¢ store.  The total cost to complete two wreaths is less than $10. 

You will need:

Two pie tins
Assorted black flowers
Assorted black foliage
Creepy elements such as mice, spiders, skulls, etc.
Glue gun and glue sticks
Black ribbon
Sharp scissors


Begin by removing the innermost area of the pie tin.  Flatten by pressing down. Careful!  Edges are sharp. 


Cut two even pieces of ribbon. Glue the ribbon down onto the tin circle in a loop fashion. 


Next, begin gluing foliage and flowers around the perimeter of your tin circle. 


If you prefer a simpler design, you can stop here.  

If you are a person who enjoys the ooky-spooky side of Halloween, adorn your wreath with some spooky or creepy elements. 

I chose mice, 99¢ for the bag of five, a skeleton garland, which included four skeletons for 99¢, and this lovely branchy limb, also 99¢.  What I like most about this branch is the faux spiders that come already attached.  

Dismantle the garland by cutting the hemp thread and removing it.  Cut and divide the branch as evenly as possible for the two wreaths.  Add spooky elements around the perimeter of your wreath.  


Finally, place skeletons on either side of the wreath.  All done!!


After hanging these on my door, shown here, I think they were a bit small, so I decided to hang them in the house.  Note to self:  Measure. Lol. 

It works just as well for indoor, if not better.  Shown here. 

What I love about this project is that I didn't have to go though the tedious task of trying to remove the residual hot glue.  It actually looks like spider webs, so I opted to leave it there.  


If you enjoy this post, please visit the archives!  You may also visit my full profile to view my other blogs. Connect with me on my Facebook Page, Parsimonious Décor Darling.   You might like to visit my other blog hubs,

The Marvelous Maison, a lifestyle blog hub and 
Frugal Fab Fashionista, my fashion blog hub. 

Follow me on Pinterest!!  Please be sure to kindly follow the board guidelines, as it takes time and effort to find fabulous pins across the Internet and Pinterest!  Thank you!  

Thank you for stopping by! ❤