
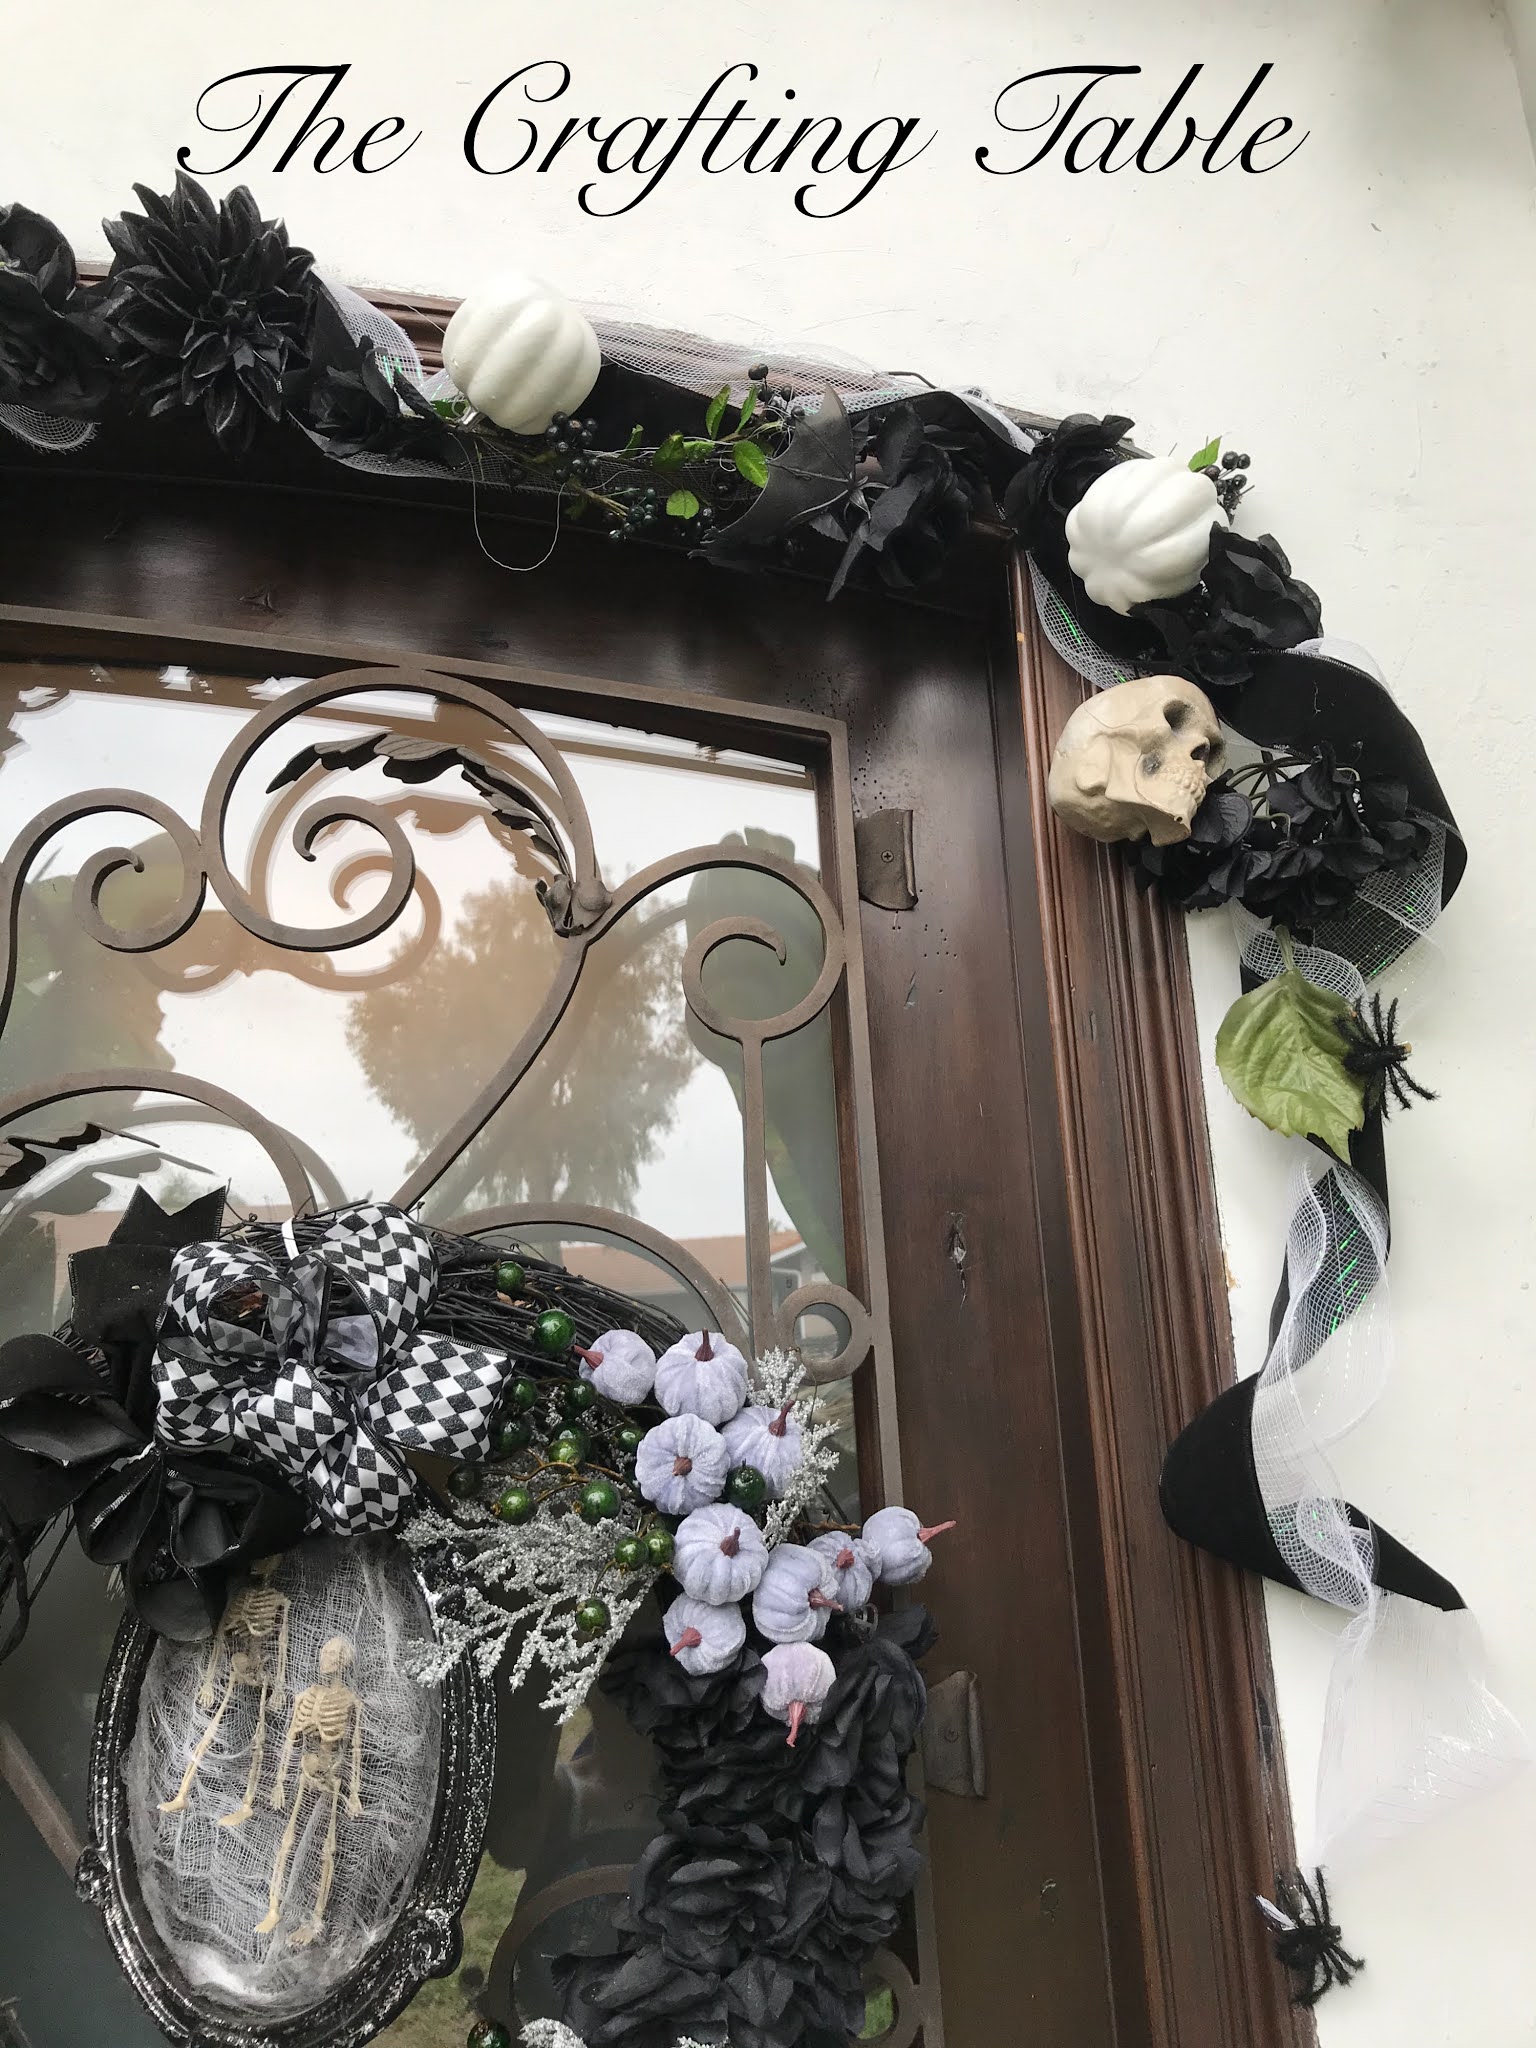
Hello there!! I hope all is well for you and yours out there in the bloggersphere and beyond!! All of my Halloween decorating was completed a few weeks ago, however, today I thought I would share a last-minute tutorial of the super simple garland I made this year.
This is really a variation of the same method I used to make my Fall Harvest Runner years ago. You may view that tutorial in the archives here.

To create this garland, you will need:

Crafting mesh
Faux white pumpkins (or in my case, faux pumpkins that have been spray painted white)
Spooky elements like spiders, bats, skulls, et cetera
Ribbon
Faux black flowers and/or foliage
Paper clips
Hot glue gun and glue sticks
Scissors
I began by layering my ribbon over the mesh.


Flip over and glue into place sporadically down the length of the mesh, approximately every two inches or so.

In the exact middle of the garland (or where it will center over my doors) is where I placed the most detail. It is also where I began to add the faux foliage elements. Place the larger floral stems onto the ribbon,

and use extra ribbon to reinforce. I love this sparkly, glittery option. Hot glue to hold together.

Add the larger elements here as well. Hello, Mr. Spider!!

For the addition of the skulls, I used paper clips.

Cut standard paper clips into thirds, which will make them into small hooks.

Gently push the paper clip portion into your skulls.

Glue into place.

You may now thread the foliage stems through the hanger you have just created and add to your garland, reinforcing with ribbon where needed.

For the addition of the pumpkins, I had to spray paint these little blue pumpkins because all of the white ones were sold out at the 99 Cent Store. Luckily, I already had some paint on-hand. I began by removing the tops of the pumpkins and then painting. Allow for dry time.

To create anchoring hooks for the pumpkins, this time I used medium gauge wire I had leftover from another project.

I simply cut it into sections, folded each section into little loops, and gently pushed it into the tops of my pumpkins. I then replaced the stems. You may also opt to add additional hot glue to reinforce if you prefer.

Finally, add your elements down the length of your garland, and hang in place. Viola!!

More shots of the detail.


Stay safe, take care, and Happy Halloween!!
Where to buy:
Ribbon, skulls, bats, clip-on spiders, large spider, black roses, and pumpkins, all, The 99 Cent Store
Crafting mesh, The Dollar Tree
Black dahlias and faux berry sprays, Hobby Lobby
No comments:
Post a Comment