Translate

Tuesday, March 25, 2014

A Tisket, A Tasket....Spring Flowers in a Basket

Hello, dear friends!  Thank you for taking the time to stop by! 

Well....it has finally happened!  On a recent excursion to my two of my fave home improvement haunts, Lowe's and Home Depot, I found that they have brought out the perennials and annuals....at last!  I love fresh flowers, and even strolling through those aisles which are rich with the aroma of honeysuckle and jasmine brings me joy.  This post is a simple yet lovely way to display Spring florals....I hope you enjoy.
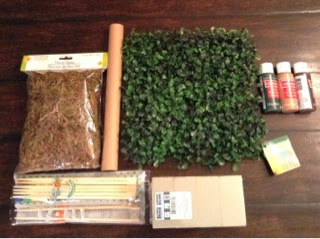
You will need:

A small basket
White paint
Spring blooms, real or faux

I began by whitewashing a simple inexpensive Easter basket.

Because the basket will be full, it was not necessary to paint the inside.  I also used a very gentle hand...it is ok to allow some of the basket to show through, to me it gives the basket a charming weathered appearance.


Remove the handle. 


If fresh florals are not available to you in your neck of the woods or you want to reuse this year after year:


Use a glue gun to bead glue onto the rim of your basket. Add greenery. 

Once the entire rim of the basket is covered in foliage, add your florals. Nothing says Spring to me like pastel colored blooms, and here I've used faux peonies. 


If fabulously fresh is your preference, place a small flower arranging foam block into the basket.


 Add blooms.  Aren't these gorgeous!!?

I like the idea of adding florals at an angle for a basket arrangement, so it appears as though the flowers are "spilling" out of the sides of the basket. 


Voilà!


To see these featured in my Spring Tea Tablescape, visit the post on my blog Parsimonious Décor Darling here.


Where to buy:  
Faux florals:  The 99¢ Store
Basket:  The Dollar Tree
Paint:  Walmart


If you enjoy this post, please visit the archives!  You may also visit my full profile to view my other blogs. Connect with me on my Facebook Page, Parsimonious Décor Darling.   You might like to visit my other blog hubs,

The Marvelous Maison, a lifestyle blog hub and 
Frugal Fab Fashionista, my fashion blog hub. 

Follow me on Pinterest!!  Please be sure to kindly follow the board guidelines, as it takes time and effort to find fabulous pins across the Internet and Pinterest!  Thank you!  

Thank you for stopping by! ❤


Saturday, March 22, 2014

DIY Pastel Victorian Tea Sachets

Hello, friends!!  Thank you so much for taking the time to stop by and visit my blog!

I am a lover of antique lace, and in one of my previous posts, I discussed how to wash lace in coffee or tea to create your own antique lace.  However, with Easter forthcoming, I though it may be fun to create something completely kitschy and fun, so in this post, we will create sachets, this time in fun colors indicative of the Spring season.  

You will need:

Lace doilies
Food coloring
One bowl for each color you are creating
Tea bags
Hemp thread
Ribbon
Small cameos

To make a pastel colored lace doily, drip a minimal amount of food color into your bowl. If you use too much color, the doilies will come out dark.

Wash (allow to soak) in the color for approximately twenty minutes, or until you achieve the desired color.  I wanted very light pastel colors, so I washed my doilies approximately five minutes.

Pat dry.


 Lay on a paper towel and allow to dry completely. Here are my lavender, pink, and baby blue doilies, sweet, no?

When your doily is completely dry, place an assorted tea bag right into the center.  I chose two of my favorites, Earl Grey and English Breakfast by Bentley.

Tie with a bit of hemp thread.  Trim.  Set aside.


Next, dismantle the cameo earring (99¢ per pair at the 99¢ store) by removing its hook. 


Tie down your ribbon onto the sachet. 


Right before you tie your bow, thread your ribbon through the hole in the cameo, and tie onto your sachet. 


All finished!!


*****Please note:  If these sachets are intended as gifts, use the hemp thread.  If you'd like to use them for a tea party, I'd suggest omitting the hemp for easier access to the tea.  


To see these adorable sachets featured in my Spring Tea Tablescape, please visit the post on my blog Parsimonious Décor Darling here.


If you enjoy this post, please visit the archives!  You may also visit my full profile to view my other blogs. Connect with me on my Facebook Page, Parsimonious Décor Darling.   You might like to visit my other blog hubs,

The Marvelous Maison, a lifestyle blog hub and 
Frugal Fab Fashionista, my fashion blog hub. 

Follow me on Pinterest!!  Please be sure to kindly follow the board guidelines, as it takes time and effort to find fabulous pins across the Internet and Pinterest!  Thank you!  

Thank you for stopping by! ❤


Wednesday, March 19, 2014

Mini Topiary Tree Tutorial


In my last post, I used contact paper to make little Welcome to Spring gift planters.  I also began contemplating my next Tablescape post for my other blog and I thought, wouldn't it be fun to make little trees for each setting as place card holders?  So, rather than tossing the empty paper roll, I reserved it.  The following craft will have two supply lists as well as varying directions:  one for a small tree (utilizing the roll) and one for a larger tree in case you don't have a small roll on hand.


For a large topiary tree you will need:
Small cups (Dixie-cup size)
Chopsticks or wooden dowel
Styrofoam balls
Green, tan, and brown paint
Floral moss
Floral arranging foam
Floral arranging beads or stones
1 faux grass mat

For a small topiary tree you will need:
A tiny paper roll
Chopsticks or wooden dowel
Styrofoam balls
Floral moss
Green, tan, and brown paint
Floral arranging foam

Where to buy:
Chopsticks, The 99¢ Store
Grass Mat, The 99¢ Store
Floral moss, The Dollar Tree
Mini cups, The Dollar Tree
Floral foam, The Dollar Tree
Paints, Michael's Crafts, $1.50 each 

First step:  Paint all of your styrofoam balls green.  I chose a very dark forest green.  I used medium (golf-ball sized) balls for the larger trees, and smaller (large gumball sized) for the smaller trees.

Set aside to dry. 


Next, separate and paint your chopsticks brown. 


Once dry, I measured approximately 4 3/4 down the chopstick and made a notch using an Exacto.


Using a knife with a serrated edge, saw the chopstick where you made the notch. 

Repeat process to remove the square bottoms of the chopsticks.  Set aside. 


Paint a small cup inside and out for each large tree with the tan color. I painted two coats; paint until the color is opaque. Set aside. 


Paint your paper roll with the same tan color. 

Once dried, I measured at approximately one and one-half inch intervals and marked. 


Draw around the roll. 


Cut out with the Exacto.


I created a bottom for each by first disassembling a cup.  

Bead glue onto the rim of your little tube.

Place onto the disassembled cup. 


Trim.  You now have a mini pot.  Repeat until you have the desired amount.  Set aside.  


Using an apple corer, I cut several cylinders out of the floral foam, one for each of the small trees.


Use an Exacto to trim to size by placing the cylinder into your little pot as a form of measure. 


Bead glue onto the bottom of your cylinder,


and place into your mini cup. 


Bead glue onto the blunt end of one of the pointy chopstick halves.


Gently push into your foam. 


Once cool, gently push the pointy side into one of the smaller pre-painted styrofoam balls.


Next, bead glue into your mini "pot." 


Add floral moss and arrange so that there are no visible gaps or foam.  Your mini tree is complete!  Set aside.


Cut your floral foam into several small blocks, one for each of your large trees.


Bead glue into your mini "pot."

Place the foam block right inside to create a foundation.  


Gently push a chopstick into the foam and remove to make a hole.  Set these aside.


To create the treetops, first disassemble your faux grass mat.


What is great about these is that each little piece has a flat platform from which the leaves spring, making it very simple to glue down. 


Bead glue onto one of your larger balls,


and place the leaf platforms.  Continue to build and cover the ball.  I used a toothpick to hold the little platforms in place about ten seconds each to allow cooling time.


Continue this process until your ball is almost completely covered. 


On one side, leave a small gap. 


Where you have left a gap, push in and remove your chopstick half.  


Bead glue into the hole you've just made,


and place the chopstick half inside, holding until cool. 


You can now add to your pot.  Where you previously made a hole in the foam, bead glue.  Place the chopstick into the hole, and hold into place until cool.  Add a few beads inside until the tree is able to stand upright without teetering. 


Bead glue into your mini pot, and arrange the floral moss, covering any visible areas.  All set!!


To see these trees featured in this Tablescape, posted in the springtime of 2014, please visit the post on my other blog Parsimonious Décor Darling by clicking here.


If you'd like to see the trees featured in my Christmas Tablescape for 2014, you may visit the post on my other blog here.


If you enjoy this post, please visit the archives!  You may also visit my full profile to view my other blogs. Connect with me on my Facebook Page, Parsimonious Décor Darling.   You might like to visit my other blog hubs,

The Marvelous Maison, a lifestyle blog hub and 
Frugal Fab Fashionista, my fashion blog hub. 

Follow me on Pinterest!!  Please be sure to kindly follow the board guidelines, as it takes time and effort to find fabulous pins across the Internet and Pinterest!  Thank you!  

Thank you for stopping by! ❤